Custom Token
Custom Tokens are similar to Custom Tiles, in that they can be used to make tile/token-like game objects. The difference is that Custom Tokens are able to "cut out" the transparency of an image to make a token with a customized shape.
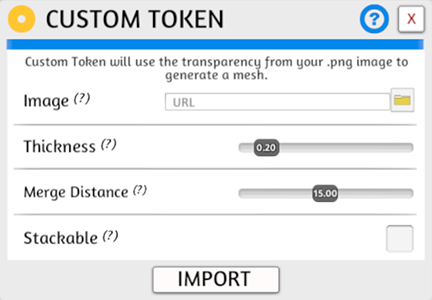
Importing Custom Token
In-game, navigate to the top of your screen and select Objects > Components > Custom > Custom Token.
Importing Assets
How you choose to import files impacts if other players can see them when you're finished.
For help with importing, visit Asset Importing.
Import Options
| Setting Name | Description |
|---|---|
| Image | The image that will be used to create the token. |
| Thickness | How thick, in in-game units (about an inch), the token is. |
| Merge Distance | How accurate the "cutout" of transparency is performed. |
| Stackable | If this token can form a stack with others of the same type. |
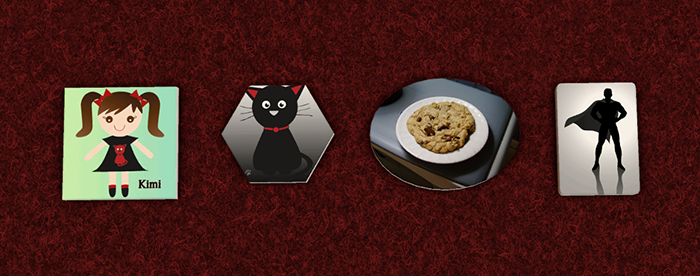
Examples
Various images with transparent backgrounds.
Token Tinting
When you use the in-game object tinting feature on a custom token, it tints the whole token, including the image.
Tips
- Images that have a transparency in the middle (like a donut) will not cut out the transparency in the middle of the image.
- If you are having trouble with the transparency not getting cut out properly, try to add a small transparent border around the entire image. It helps.
- Custom Tiles load faster than Custom Tokens. If you can use a custom tile instead, it is almost always preferable.