Zone Tools

The zone tools allow you to create areas on the table that have different impacts on game objects inside them. Hand zones are particularly important because they determine the "seats" a player is able to "sit" in.
General Zone Modification
Although all zone types work differently, the creation and modification of them is all similar.
Creation
With your mouse, left-click and hold. Drag your mouse so that the created zone will have the desired width/depth, then release.
Removal
With the same zone tool selected, right-clicking on a pre-existing zone will show a context menu for it. Selecting Delete will remove the zone.
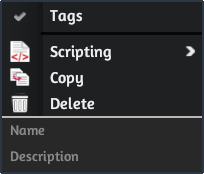
Menu Actions
The other options in the zone context menu perform the same actions they would on game objects, allowing you to open the scripting editor, copy the GUID to the clipboard, edit the zone's tags, copy it, or set its Name /Description.
Zone Specific Options
Left-clicking on a zone will provide some additional feature /options. What the left-click does depends on the zone type. You can find more information on the left-click feature below.
Tip
When you draw a zone, you aren't stuck with the shape you made it! All zones can be moved/resized/rotated by using the Gizmo Tool.
Zone Types
Each zone has different rules when it comes to visibility, left-click functionality and more. This section outlines those differences.
Hidden Zone

A hidden zone is an area that is able to hide objects from certain players. It can hide those objects from all other player colors or just one. The GM (Black seat) is always able to see what is within any hidden zone.
Hidden zones are visible to all players during gameplay, although their contents are hidden. You may alter how opaque the zones appear by setting the option in Configuration->Interface->Misc....
Left-Click Action
Left-clicking on a hidden zone will bring up a color circle and a gear icon.
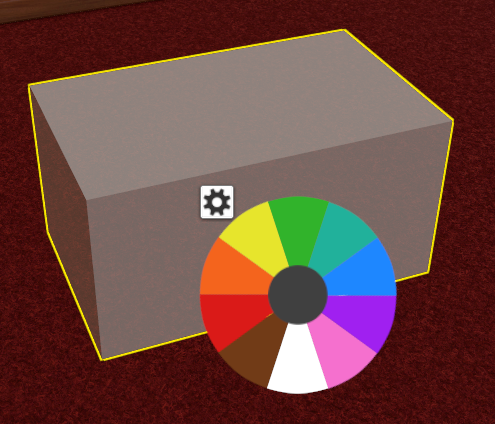
Clicking on a color will set the hidden zone will set the zone to match that color player. This determines who it is hiding for.
Clicking on the gear will open the options for this specific hidden zone.
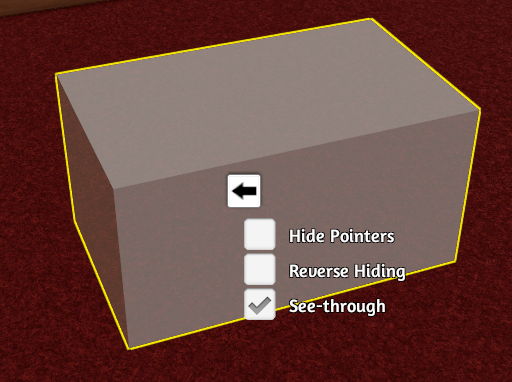
- Hide Pointers: If checked, the zone will hide pointers that are within the zone, preventing any clues to what is being done in it.
- Reverse Hiding: If checked, it will reveal its contents to all other players. Unchecked, it hides the contents from everyone but the select color.
- See-through: If checked, the hidden zone is semi-transparent. If unchecked, it is a solid color. Either way, you cannot see the zone's contents.
Tags
If you set a tag on a Hidden Zone then it will only hide objects inside it which have a matching tag.
Randomize Zone

A randomize zone will, any time the game is loaded, ask if you want to randomize the objects inside of it. The randomization will shuffle the positions of loose tokens as well as the order of tokens in a stack/cards in a deck.
Randomize zones are invisible to all players unless you select the randomize zone or gizmo tools.
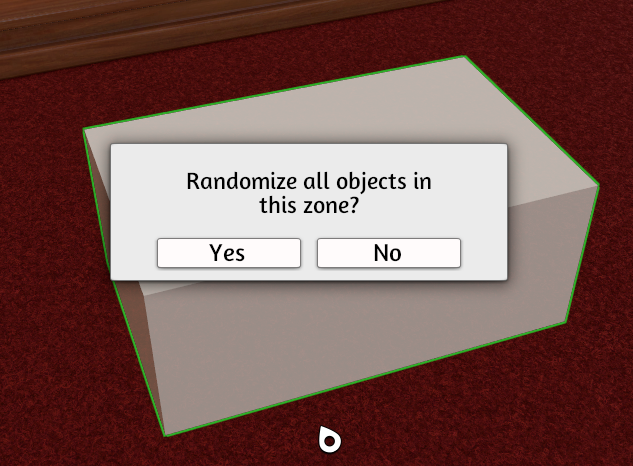
Left-Click Action
Left-clicking a randomization zone will bring up the confirmation window to randomize the zone's contents.
Tags
If you set a tag on a Randomize Zone it will only randomize items inside it which have a matching tag.
Hand Zone

A hand zone represents a player color. It not only determines where their "seat" is, but also is an area that holds items. Similar to a hidden zone, the contents of a hand zone can be hidden, but with special additional options. The contents of your primary hand zone are also able to be shown on your screen in an easy-access pop-up panel.
Hand zones are invisible to all players unless you select the hand zone or gizmo tools.
Left-Click Action
Left-clicking on a hand zone will bring up a color circle.
Clicking on a color will set the hand zone will set the zone to match that color player. This determines who the zone belongs to. If this is the first hand zone of this color on the table, it also determines where that player "sits".
Tags
If you set a tag on the Hand Zone then it will ignore any objects which do not have a matching tag.
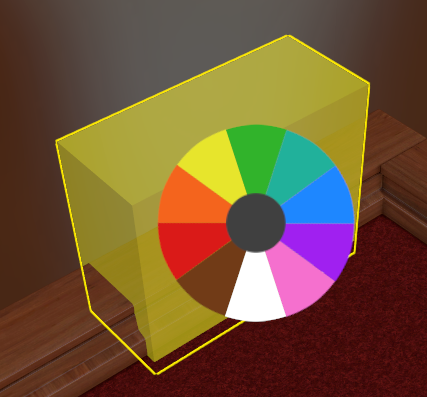
Layout Zone

Layout Zones allow you to automate some standard ways to arrange objects, typically cards. It can be used to splay cards in melds (for games like Gin), or group them into bundles (for trick-taking games like Whist), or to generally lay out groups of objects in a regimented fashion. They are geenrally most useful for arranging cards, but can be used with any object if you wish.
The Layout Zone works on groups of objects. When you drop a bunch of objects into the zone it will group those objects together, and lay them out in a pre-determined manner.
Left-Click Action
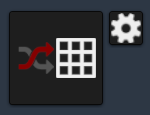
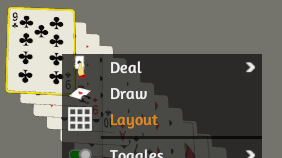
When you left-click a Layout Zone you will see a big Layout button, and a small Settings cog.
- Hitting the big button will make the zone re-layout its contents.
- Hitting the small button will show the zone's settings window.
Layout Settings
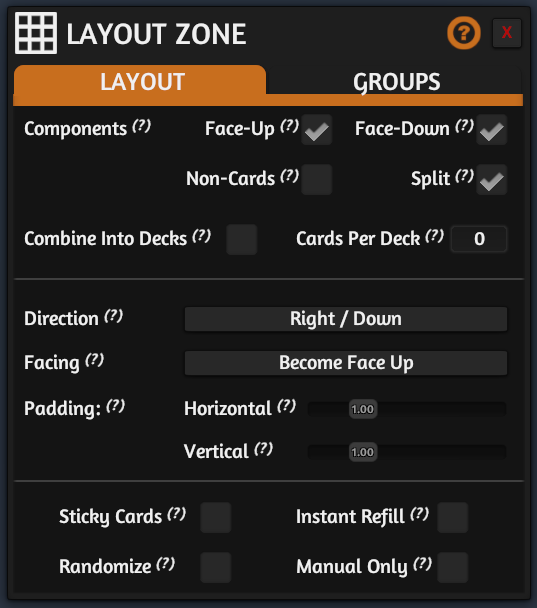
These settings govern the overall functionality of the zone: what objects it affects and how groups are arranged with regard to each other.
The Components section specifies what objects the Layout Zone will affect:
- Face-Up : Lay-out any face-up cards dropped in the zone.
- Face-Down : Lay-out any face-down cards dropped in the zone.
- Non-Cards : Lay-out other, non-card objects dropped in the zone.
-
Split : The zone will split any decks dropped in it into their individual cards.
-
Combine Into Decks : Cards dropped in the zone will be combined into decks with the specified number of cards.
- Cards Per Deck : The number of cards per deck when Combine Into Decks is enabled.
Tip
Split happens before Combine Into Decks triggers.
- Direction determines both the directions the zone's groups will be layed out along, as well as the location of the first group. For example, the default setting of
Right / Downwill lay out zones horizontally, moving right, and then when the row is filled will move down and reset to the left hand side. The starting position is always the opposite of the chosen direction (so that the space to grow into is maximised), so for a direction ofRight / Down, the first group will be placed in the top-left. - Facing sets what happens to cards when they are added to the zone:
- Do Not Change : The card's orientation remains as-is.
- Become Face-Up : If the card is face-down it will be flipped over.
- Become Face-Down : If the card is face-up it will be flipped over.
- Group Is Tipped : All the cards in the group will be flipped face-down, except for the last one which will be flipped face-up (this is a common layout in different Patience card games)
- Padding sets how much space exists between one group and the next.
Tip
Most of these settings update live as you change them, so as long as there are objects being layed out by the zone you can play with them to see the layout in action.
- Sticky Cards : Will enable the
Stickybehaviour of objects, just like the object toggle (which does not apply inside a Layout Zone). i.e. if enabled and you pick up a card which has other cards resting on it, all such cards will be picked up. - Instant Refill : When you pick up a group from the Layout Zone and move it to a different position, or remove it from the zone entirely, the gap left behind remains. Enabling this option will cause the zone to layout its objects again, filling in the gap.
- Randomize : When enabled, whenever the zone performs a layout it will randomize all the objects inside it, similar to how a Randomize Zone works.
- Manual Only : When enabled the zone will no longer automatically lay out objects inside it: you must hit the Layout button (or the Layout object-menu) to cause it to perform a layout.
Group Settings

These settings govern how objects within a group are arranged.
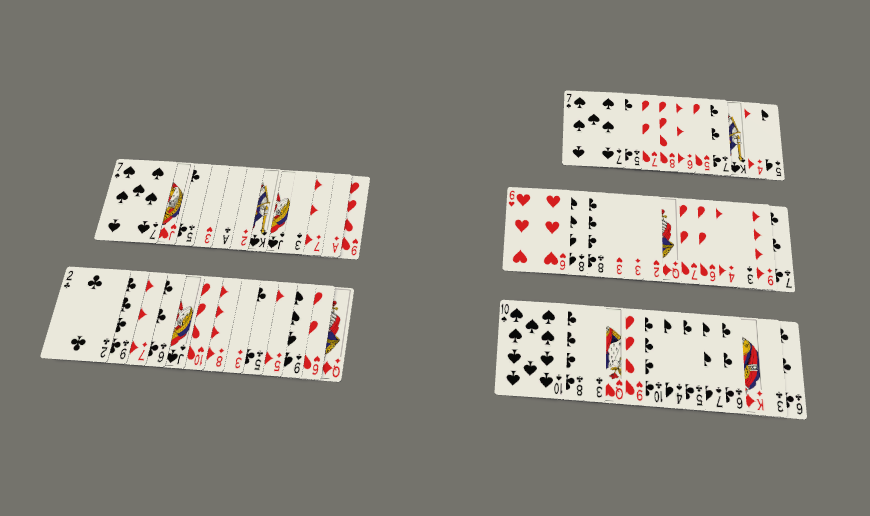
- Direction determines the direction objects within the group are layed out in. This is distinct from the Direction on the Layout tab, which decides how groups are layed out.
Here you can see that while the Layout Direction is set to Left / Up (causing the groups to start in the bottom right corner), the Group Direction is set to Eastward, meaning the cards within each group are layed out left-to-right:

This is the same setup, except with the Group Direction set to Westward:
- Sort sets how objects within a group are sorted:
- None : no sorting is applied.
- Added Time : sorted on the time they were added to the zone.
- Value : sort on the
valueproperty set in your lua script. - Memo : sort on the
memoproperty set in your lua script. - Name : sort on the object's
Name - Description : sort on the object's
Description - GM Notes : sort on the object's
GM Notes
- Reversed : when enabled the sort is applied in the opposite direction.
- Sort Existing : by default only newly added groups will be sorted. When this is enabled every group will be sorted whenever the zone is layed out.
Tip
If you will be moving objects around with groups a lot during play then it is best to set the Sort to None.
- Spread sets the distance each subsequent object within a group is moved from the preceding object.
Note
The Direction setting directly relates to the two Spread settings: an Eastward or Westward direction will only make sense of the Horizontal Spread is non-zero, and likewise Northward and Southward should only be used when the Vertical Spread is non-zero.
- Objects Per Group sets how many objects will be placed in a group when objects are dropped into the zone. If more objects are dropped together than this setting then they will be split up into multiple groups.
- Alternate Direction will cause each object in a group to either be placed normally, or rotated 90 degrees to the right, alternating from the preceding object. This is a layout style commonly used in trick-taking games to allow for easy counting of points.
- Max. Objects Per Group sets the maximum number of objects in each group. While Objects Per Group set how many objects are in a group when they are added to the zone, it still allows you to manually drop more objects into each group. This setting will prohibit a group having more objects than the specified object count. Set to
0to have no maximum. - Allow Swapping activates a special behaviour when you drag an object from one group to a group which already has the maximum number of objects possible: the object you drop on top of will be swapped back to the place you picked up from.
Layout Option in Object Context Menu
Having to select the Layout Zone tool then click on the zone and hit the button in order to manually layout a zone is a little cumbersome, so there is a shortcut: if you right-click an object which is in a Layout Zone it can be layed-out by, it will have a Layout option. Clicking it will cause that zone to perform its layout operation.
Tags
If the Layout Zone has a tag set on it then only objects with a matching tag will be layed out by it.
Fog of War Zone

Fog of War is an area that is concealed, similar to a hidden zone. The difference is that concealed areas can be revealed by moving a piece set to Reveal Fog of War into it.
Left-Click Action
Left-click on a Fog of War zone opens a menu which allows you to set the following:
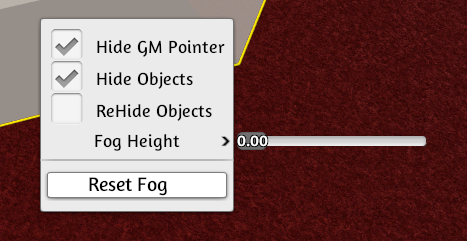
- Hide GM Pointer: If checked, this prevents players from seeing the hand cursor of the player in the Black seat.
- Hide Objects: If checked, this causes the fog to hide objects. If you uncheck it, it will just make a black plane which obscures anything under it.
- ReHide Objects: If checked, this causes any object that had been revealed in the fog to become hidden again if it is not in direct "line of sight" of a revealer.
- Fog Height: How high up the black plane is placed within the zone.
- Reset Fog: Causes any revealed fog to obscure again, as if it had been newly drawn.
Fog of War Tips
- If you have enabled "Reveal Fog of War" in an item's toggles menu you get access to additional settings in the Context Menu.
- Reveal Color: Which color player the fog is revealed for. Default is Black, which is "all players".
- Reveal Range: The radius which the object reveals.
- "Line of sight" is used, which means props can block the revealed area.
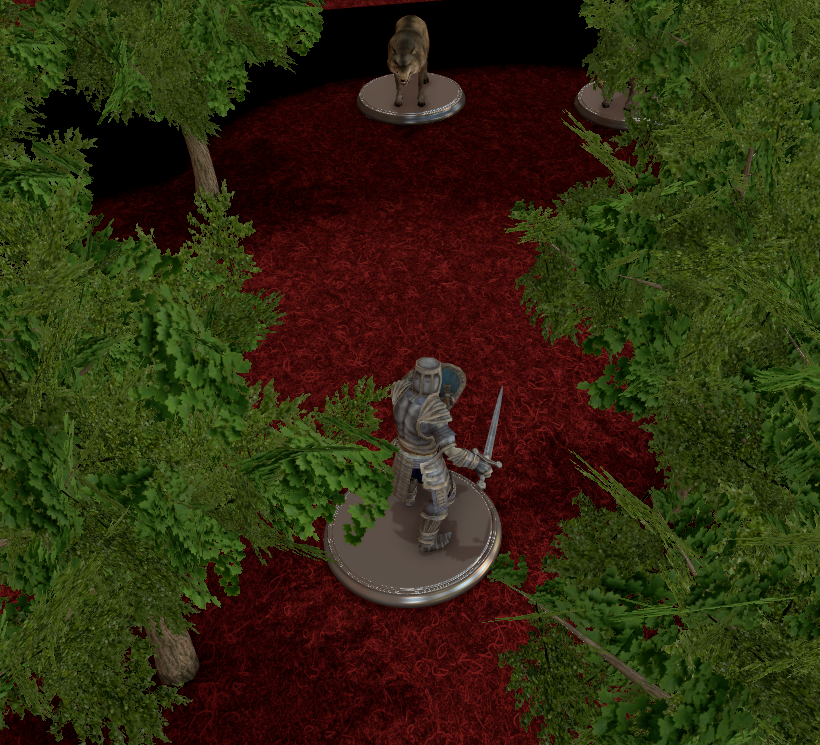
- The purpose of Fog of War is to allow game pieces to reveal map/props as they move around.
- The player in the GM seat, the Black seat, is capable of seeing everything hiding within the Fog of War. Hidden objects have a grey border around them.
- You can prevent an object from being hidden by Fog of War in its toggles menu.
- If you join a player's team, you can see what they have revealed for them.
- Example: If you wanted 2 of your 4 players to see what is revealed, you could put them on a team together and reveal for only 1 of the colors.
Scripting Zone

A scripting zone has no impact on game objects itself, but it can be utilized by Lua scripting to detect/affect objects in an area. It has no use outside of scripting.
Scripting zones are invisible to all players unless you select the hand zone or gizmo tools.
Left-Click Action
Left-clicking on a scripting zone copies it GUID to the clipboard. You can then paste it into your scripts. This is generally how you identify scripting zones in your code.

You will see a pop-up message announcing that this has been done, as well as a message in the Game chat log.
Tags
If a Scripting Zone has Tags set on it then only objects with matching tags will be reported when you do zone.getObjects() in your lua script.